All of the above being said, I thought it might be time to come back and revisit the rifle and possibly even do some more custom work to it. The rifle is and was by no means perfect and there are some flaws that I wish to address, and hopefully will allow some people to even make their rifles that much better.
The four things I wanted to address in this article are:
- The durability of the spray on aluma-hyde and how it has been wearing
- The possibility of a different affordable stock
- Applying a custom epoxy texture to the existing stock
- Helping the cheek-weld with the existing stock
Aluma-hyde Durability
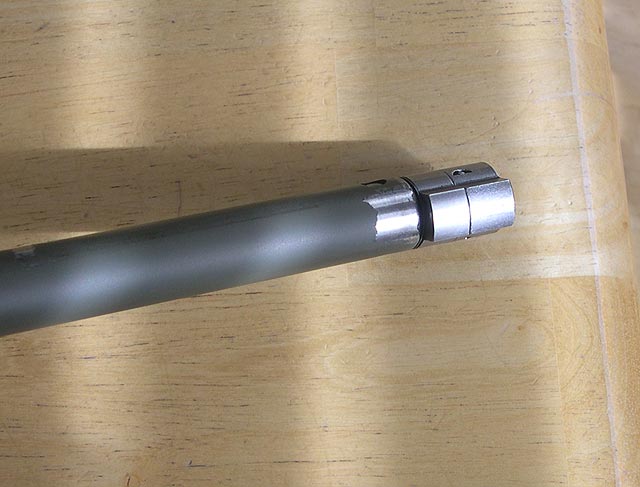
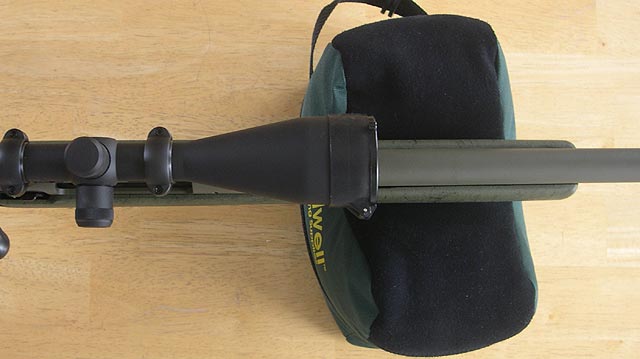
The aluma-hyde spray on finish went on fairly nice and actually continues to look pretty good. I like green rifles so I think the rifle has a nice appearance to it and some of the black pieces tend to offset the rifle nice. The aluma-hyde goes on "fairly" thin especially if you take your time and do light even sprays. But how has it been holding up? Well, good and bad. It seems that wherever the surfaced was properly prepared and roughed up, it is holding up quite well! Of course, this should probably not come as any big surprise to anyone, including myself. It seems the single biggest factor in the durability of the finish is how rough or porous the surface is, which makes sense as the epoxy finish needs something to bind to. If you recall, the barrel came to us in the white with a fairly rough matte finish on everything except the crown area. Well, guess where the aluma-hyde has flaked off? It happened after only a few shots, and has spread no further than that. Here is a picture:
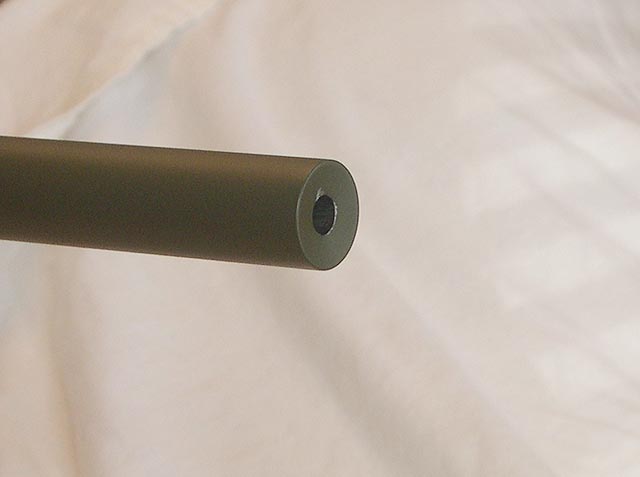
It is highly advisable to rough up the crown area on the barrel, but one needs to be cautious to avoid damaging the delicate crown. A wire wheel is a possibility if careful, but some sandpaper should work as well and would give you a bit more control to avoid damage, but will take some more elbow grease.
Another high wear and high shine area was the actual bolt, and it did not take long for this area to wear quickly also. But I knew this would happen, and the area that is exposed to view while the bolt is in the rifle is still covered nicely, mainly because it is in a light wear area, I'm sure the finish is not bonded very well anywhere on the bolt because it was polished so smooth.
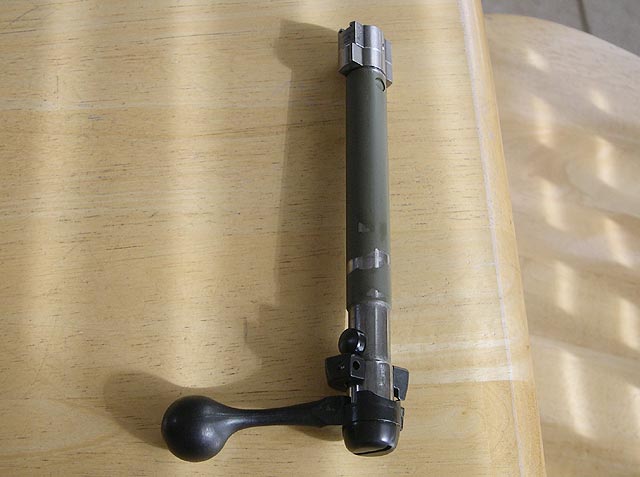
Probably my next upgrade will be to take the bolt and bead blast it to rough it up and then apply a bake on teflon/moly finish (available from Brownells). I like to apply the teflon with an airbrush (nice and smooth and thin) and then it is easy to bake in the kitchen oven. The teflon provides a very nice finish and is self lubricating, which is nice to have on a bolt, but the durability is not that great, but that should be fine on the bolt and the bead blasting will help with the durability, giving it a nice surface to bond to.
Overall I am sufficiently happy with the durability of the aluma-hyde on the surfaces that were properly prepared; especially with the ease of using the aerosol can to apply it. It also has held up well on the stock and the fiberglass appears to provide enough of a porous surface to allow it to bind quite well. I have one tiny nick in the paint on the stock; probably less than 1/16".
A new stock
Back when I originally did the sub $800 project, I wrote how I liked the shape of the stock that we got from Brownells but that the finish on the stock was poor, though the fit was nice, and I thought a different stock would be better. I decided to order up a different stock and began searching for one. The Bell and Carlson stocks have been gaining in popularity and the ones I have seen and used on other rifles seemed to have always been nice, so I started looking there. The medalist stocks are the ones with the aluminum bedding blocks like the HS Precision stocks, but they are all out of the price range for this rifle. Now, I did find that they were offering a Duramaxx stock with no bedding block for the heavy barreled savage rifles and they were just a bit over $100, and possibly even cheaper when found on sale. I wanted to stick with the green and black theme of the rifle so I ordered a green stock with black webbing from Midway USA.
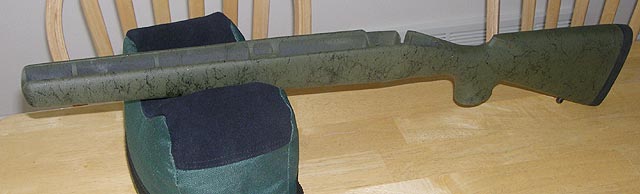
The shape of the stock I would say is similar to the standard 10FP stock or even the M40A1 stock (HTG) with maybe a bit wider forend. It is a fairly standard shape, but with a slightly more vertical pistol grip than a normal sporter stock. I was hoping for a wide forend that you normally find on varmint type stocks, so I was a little disappointed. The stock is also hollow with strengthening ribs which explained how they are so affordable, but left me thinking it may not be as firm as I would like and I might see some flexing in the forend which is a problem with the standard 10FP stocks. Initially, I was not excited and actually had the stock for several months before I ever even test fit it to the rifle.
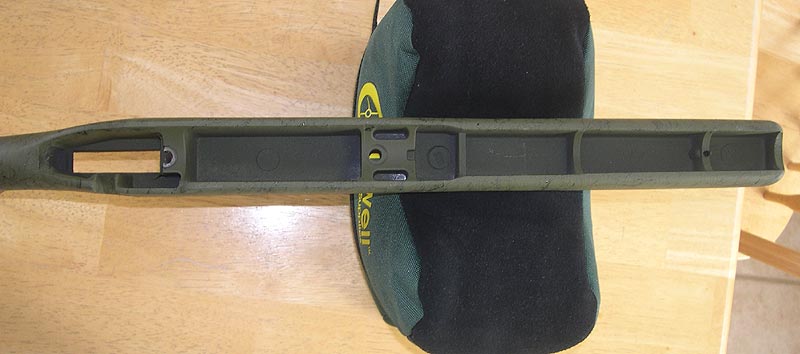
But then an interesting thing happened, I actually pulled it out for this review, re looked at it more closely, and even mounted it on the rifle. My second impression was much better than my first. I actually quite liked the shape, though I would still prefer a wider forend, and I especially liked the feel of the finish. It provided a nice griping surface that was warm to the touch and non slipping. I was still worried a bit about the strength and flexing, until I mounted it. The barreled action fit very nicely into the stock and it was a simple bolt up process. The fit was quite nice. The barrel appeared to have space between it and the forend and I then checked the flexing in the forearm by squeezing the stock and barrel together, and by golly, it shows considerable more strength than a typical 10FP or 12FV Savage stock. I would even go so far as to say it was perfectly functional. I checked the free floating of the barrel and there was good space all the way back to the receiver.

Now, I will mention that there are no pillars or bedding block, and no means to be able to do any real effective glass bedding in the stock, so what you see is what you get in terms of bedding, and there is no real means for improving accuracy in those regards. There is pretty minimal contact area between the action and stock and I would suspect that accuracy should be the same between this stock and the existing one. You are probably wondering if I checked the accuracy with this stock on, and the answer is no. I had actually grown to like the shape of the first stock and decided I would do a few things to it to make it better and work for me, and actually sold this stock off.
I will say that this stock is actually a definite possibility if I were to build another one of these rifles. It was a pleasant surprise when I actually got to handling it and it makes a fine looking rifle that is very functional. The fit and finish is actually quite nice for the price of the stock, far better than the unfinished stock that I originally used on the rifle and unless you would like to take the time to prep and finish the stock I used before, I would probably recommend this B&C stock for the project. They are available in all sorts of colors and patterns from the factory and one can get pretty creative when putting together a rifle.
Grip Texture
During the period of when I had the new B&C stock and had not yet really tested it out or put it on the rifle, I had decided that I actually really liked the shape of the existing stock and that the imperfections were merely cosmetic and did not affect the functionality of the rifle at all. They could have been fixed in the early phases of construction with some filler and elbow grease, but I never did that, and now I really don't notice them much, as I said, they are purely cosmetic. Hey, it also means I don't feel too bad if I lay a big scratch on the stock, as it wasn't perfect in the first place! So, I had decided to keep the stock, which meant I would like to address a few things with the stock that I thought could be better. One of those was the cheek-weld, which I'll address in the next section, and the other one was the grip feel with the aluma-hyde finish. Because the stock was smooth fiberglass in its unfinished state, when the aluma-hyde was applied, it had the feel of a "painted" surface. It really wasn't the best feel to the hand, and was a little slick in certain conditions. I wanted a better gripping surface with the firing hand. Because the rifle is mainly fired from the supported prone position with the off shooting hand on a sand sock, I wasn't too concerned about the forarm area, but if possible I wouldn't mind improving that also.
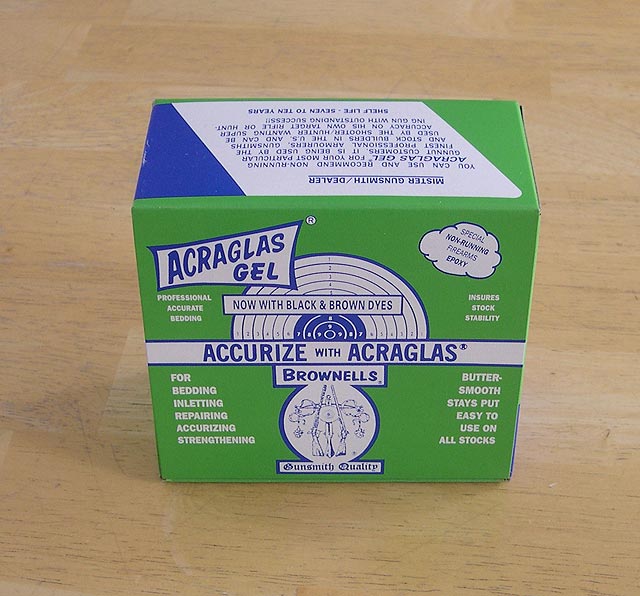
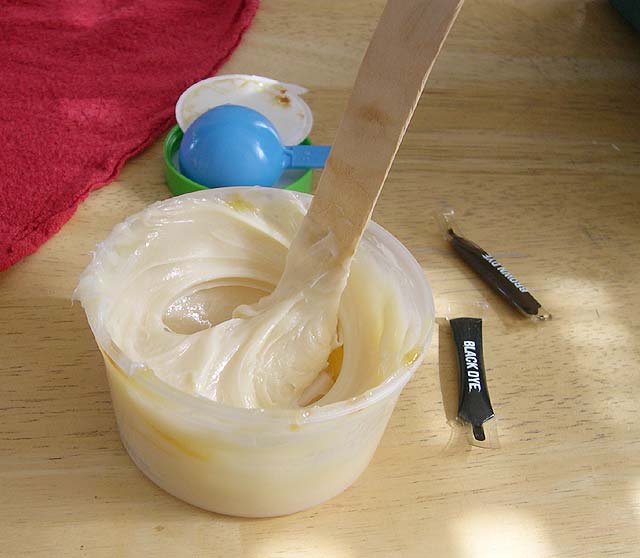
So, how could I improve the texture and feel of the stock? I sure love the feel of the grip area of my Tactical Operations Bravo-51, so I figured I might as well give something like that a try! Heck, the black color would actually aide the appearance of the stock even, and the extra bulk of the epoxy would give a bit more "palm swell" effect to the grip area. I know that Tactical Operations has their way of doing it, and some talk about this subject has happened on the forums as well, so I had a little bit of an idea on how to do this, but had never actually done it. The way I saw it, the biggest concern to me was getting the glass to a state where it was semi firm, enough to hold a shape and not run. I do have a good bit of experience using Brownells accu-gel bedding compound which is a thicker consistency than typical runny glass resin. It is kind of like the consistency of butter, and I thought that it would give me a good foundation to start with, so I ordered a bedding kit from Brownells. I actually had some of the product on hand that was purchased in bulk, but the kit comes with mixing cups & sticks as well as dye, etc. and I thought it would be more along the lines of what you as the reader would purchase.
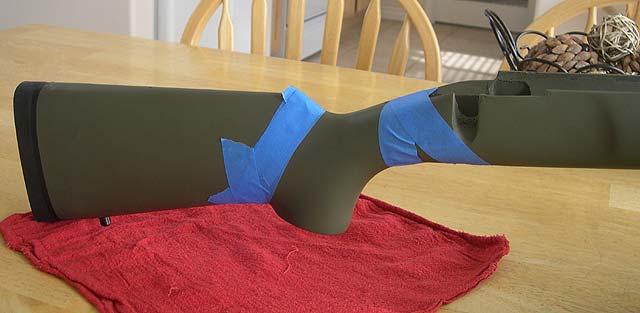
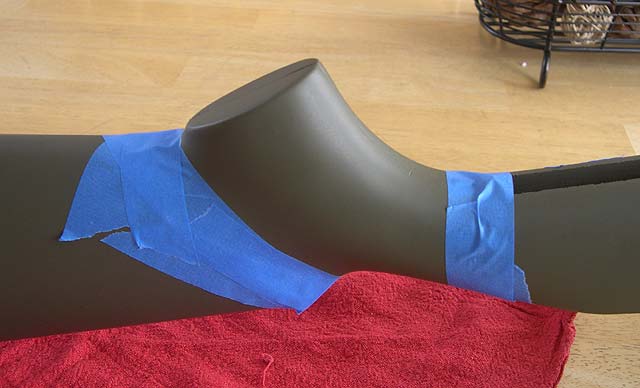
The first part of the process is the preparation of the stock. Insure that the surface that you will be applying the texture to is clean of oils and debris. I grabbed some painters tape from the local Wal-Mart to use for my masking. Painters tape is great because it has enough stickly to hold it right where you want, but not enough to "Really" stick and it is very easy to remove without taking any of the paint with it that it was sticking to (not that that was a concern with the aluma-hyde). It is a bit spendy for a roll, but the $4 or so is worth it. I went ahead and masked off the area I wanted the texture applied to, and here, I would suggest you get creative. I was fairly conservative about where I was placing the texture and looking back at the finished product I would do it a bit different now, maybe adding some more curves and covering more area further back and generally I would be a bit more creative than I was. It still looks good, but could look better! So don't be shy.
There is no reason to be skimpy using the tape either. You might as well give yourself plenty of leeway in case you get a little sloppy or crazy with the glass-gel. You can use multiple layers to get some of your compound curves, and those of you with some autobody experience, I'm sure you can execute some pretty elaborate curves and shapes, but not I, at least not yet!!
Once you have the tape all in place and you are ready to go beyond the point of no return, then it is time to mix up your glass. One of the best features about accu-glass & gel is that it is a simple 1:1 ratio of resin to hardener. No weird ratios and calculations. Just do one part resin and on part hardener. In this particular case, I just emptied all of each and made one big batch of gel, which was MUCH more than I needed for this small grip area. In fact, it was probably enough to do the forarm also, but I didn't know that at the time and never prepped the forarm. Oh well. So anyway, put the two parts together in the mixing dish, and start stirring away. You want it completely and thoroughly mixed together so you do not get any soft spots in your glass-gel.
Once you have been stirring for a while, go ahead and add in your dye. It does not take much as the dye is super potent. I put in like 5 or 6 drops for the whole mixing dish and it turned it pretty black! Continue to mix it up until the dye is thoroughly mixed in and everything is black. Now the fun starts. The kit came with a big "popsicle" stick that I used for the stirring, and it turns out that it works great for applying the gel to the stock. I spread it on like cake frosting, putting it on fairly thick and even all the way around. You'll need enough gel there to be able to make it "stick" up, so go ahead and be a bit liberal, though I will caution that if you get WAY to much on there, you may have a pretty thick grip area, but then again, you may want that.
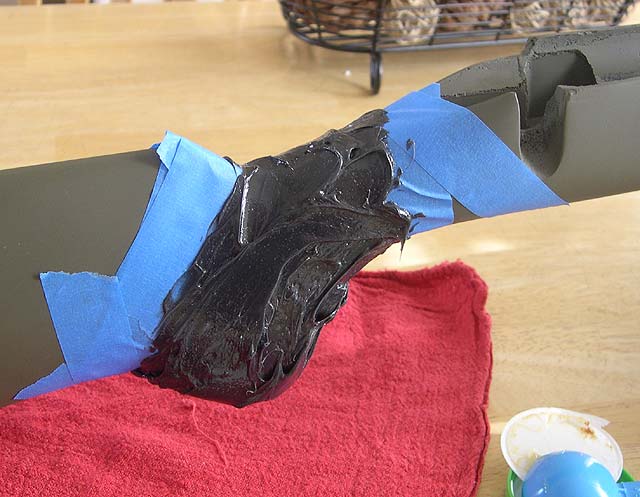
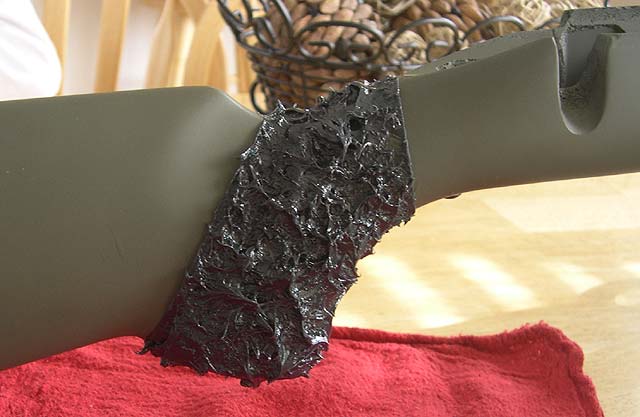
Okay, so now we have our frosting spread on the grip, we need to give it some cool texture that actually provides us with a good gripping area. I did not have a sponge in order to splotch the glass-gel and get it to "rise" up, so I decided to use an old towel. I dampened it and began splotching... well, I think the damping part was a mistake, as it didn't allow the gel to stick enough to the rag to get it to rise up. So I went to the dry part, and it worked better, but not totally with the control that I wanted. So after all that planning, it turns out that my trusty applicator stick once again came in handy as the rag got it pretty good, but then I used the flat surface of the stick to splotch and raise the glass to get the texture you see below.
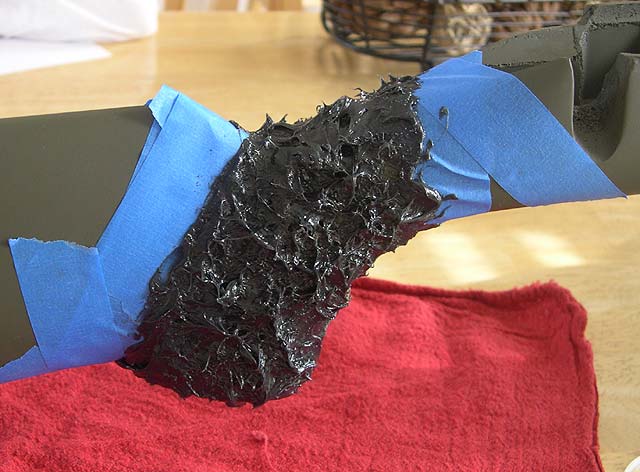
Now, while the next part is not hard, it is a bit tricky, and I don't think I did it quite right. That is, when do you remove the tape? Obviously, if you leave it there until it dries, it will be left there forever! Once that glass dries, it is PERMANENT! The fact that I used accu-gel with its buttery like consistency made this part a bit easier because it stays in position much better than a typical glass resin. So if I pulled it too early (which I did) the glass-gel just did what it was suppose to and stayed put. You are suppose to wait until it gets a bit tacky and then pull the tape, but, well, it started out tacky, and I didn't know quite when to do it so I pulled it after about 15 minutes, and the glass was still pretty much the same tackiness as when I applied it. But alas, once in a while we get lucky and it all worked just fine. Here is a picture after I pulled the tape... it doesn't look half bad!
Now, it is pretty much done, but I will mention two other steps that I did, though they could really be improved on. After drying for about 3 hours, the grip was pretty much firm but you could feel some tiny bit of pliable ness still there. So I squeezed the grip area with my hand to try and even, or smooth out, some of the sharper portions from the lifted gel. I thought that would do it, but after I let it harden for twenty-four hours, and then picked it up, I nearly had several puncture wounds in my hand! There were some VERY sharp portions of the texture. So, I took a trusty file and knocked down all the really sharp edges and portions in the texture and now, it feels great and is very functional! It fills my hand very well, and besides the fact that I could have done a better design of where I applied it, I am very pleased with the end result.
Improving the Cheek-weld
The last thing I wanted to cover in this follow-up, and the last real problem with the rifle that I wanted to fix is somewhat similar to the grip area. The cheek-weld on this stock was never something to brag about, that is for sure. The surface was smooth and somewhat slick and that is not a great combo for a precision shooting rifle. So, the best solution I could come up with was to use one of the excellent Eagle Industries stock packs/cheek pads. They typically run about $35 from various places and I have them on several of my rifles. But, I saw that Blackhawk was coming out with there own version and I figured it would be advisable for me to try out the Blackhawk instead so I can stay on top of the new stuff coming out. So when they were finally available, I ordered one up.
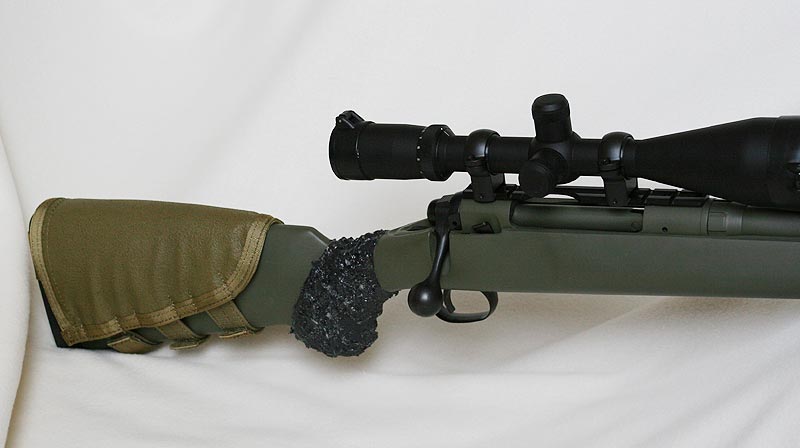
The Blackhawk cheek-pads are actually cheaper than the Eagle's, and keeping with the "affordable" theme of the rifle, I even went cheaper and ordered one without the pocket or ammo holders. In all honesty, my recommendation is to pay the extra and buy the Eagle. The Blackhawk works well enough, but it is just not nearly as good of a design. You have to put in these foam pads to build up the cheek pad to your desired height, and those pads wrap over the top and onto the other side giving a bulky, clumsy look and feel. Plus the cheek material is a weird soft rubber/plastic that does hold your cheek well, but feels a bit odd. The straps do adjust many different ways for a good fit on just about any rifle and like I said, it all worked fine, it is just not as slick of an over all package as the Eagle. With all of that being said, it does perform the intended job and has improved the cheek weld of the rifle, and it will stay on the rifle.
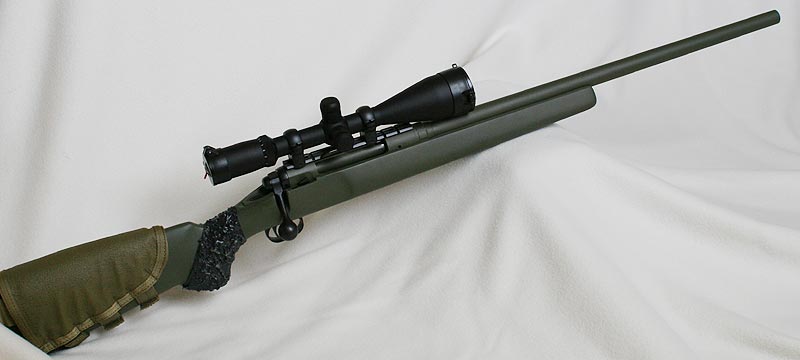
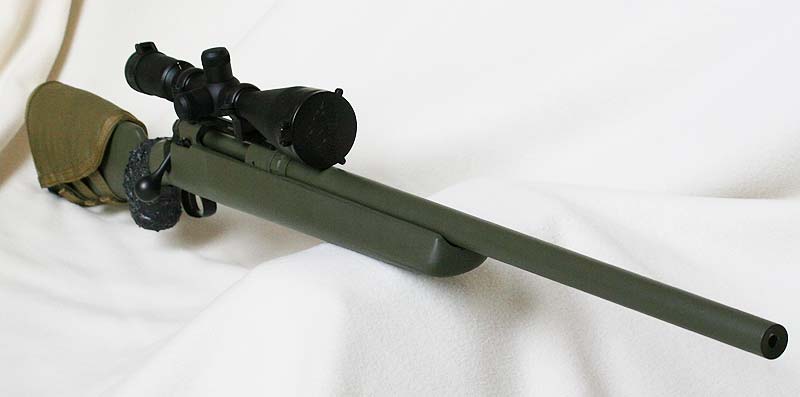
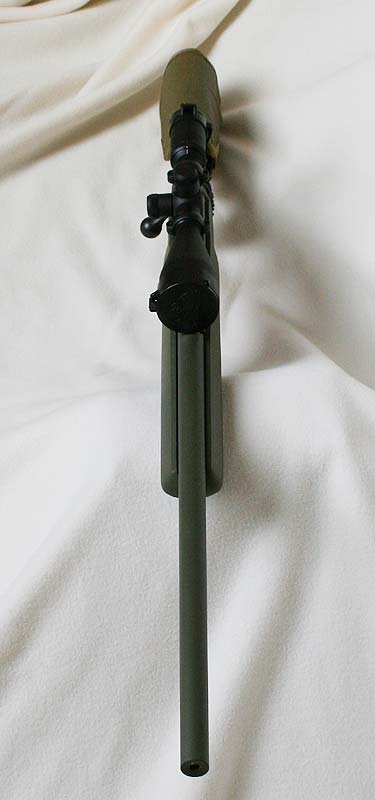
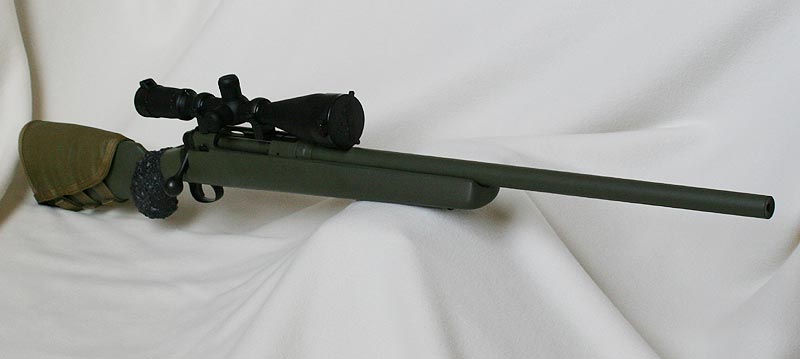
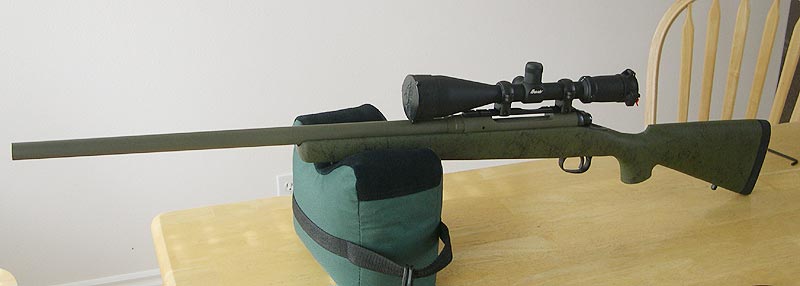
There you have all the updates and the rifle has improved even more over the original. I am quite happy with the over all rifle as it sits right now and it will continue to be used. Like I mentioned earlier, I may recoat the bolt at some point with teflon, but beyond that, I am not sure if there are other modifications I want to make. Perhaps some texture on the forarm, but I do not view that as mandatory. Hopefully I was able to provide some additional ideas for people to incorporate on their own rifles. So, to bring things to a close, I'll leave the readers with a few more overall pictures of the rifle as it now exists. Enjoy!!